
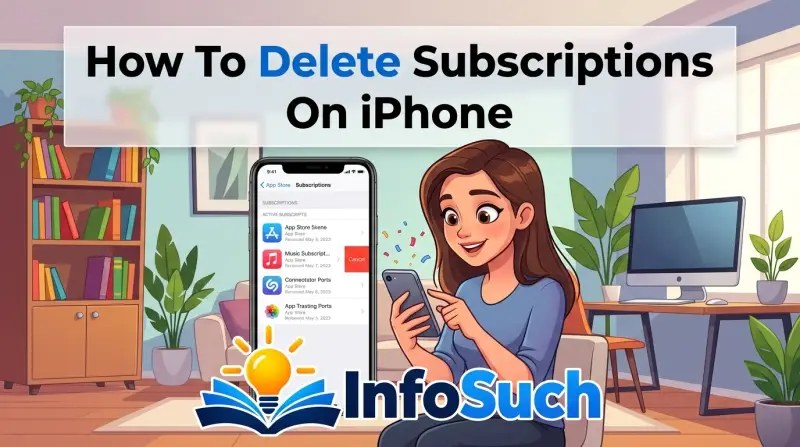
We’ve all been there. You check your bank statement and spot a charge for an app you haven’t opened in months. If you’re trying to figure out how to delete subscriptions on iPhone, the good news is that the process is usually quick.
But there’s a catch. The right steps depend entirely on how you signed up. Some subscriptions live in Apple’s system, while others bill you directly through the service’s own website.
As of 2026, Apple’s App Store hosts roughly 1.8 million apps, and a huge percentage of them use auto-renewing subscriptions. Apple’s support site splits these into two groups. There are subscriptions billed through Apple’s App Store, and there are subscriptions billed externally, like Netflix or Spotify.
That distinction matters, because it changes where you tap “cancel.” Let’s start with the quick answer, then work through the full workflow for each type.
Quick Answer: Where You Cancel Depends on How You Paid
Open Settings. Tap your name at the top. Tap Subscriptions.
Find the one you want. Tap Cancel Subscription. That’s it.
But this only works for Apple-billed services. If you don’t see the app listed, cancel directly on the company’s website instead.
That’s the short version. The longer version involves a few important details, like which Apple ID you used and whether someone else in your Family Sharing group owns the subscription. We’ll cover all of that below.
Apple-Billed vs. Outside-Billed: The First Question to Answer
Here’s the core decision that determines your next step. If you signed up for a subscription using Apple’s in-app purchase system, it’s an Apple-billed subscription. You’ll see it in your iPhone’s Subscriptions screen.
If you signed up on the web, or inside an app that bypasses Apple’s payment system, it’s an outside-billed subscription. Those won’t show up in your Settings at all.
Think about how you signed up. Did you enter your Apple ID password or use Face ID to confirm the purchase? That’s an Apple-billed subscription.
Did you type in a credit card number on a website, or log into a separate billing portal inside the app? That’s outside-billed. Simple enough, right?
Most apps with subscriptions offer both paths, which is why this trips people up.
How to Tell Which Type You Have (Check the Email Receipt)
The fastest way to know for sure is to look at your email. When an Apple-billed subscription goes through, you get a receipt from Apple with a line that says “renews on” or “welcome to”. The sender is usually Apple or iTunes Store.
If the charge comes from a company like Netflix, Spotify, or your local gym, you’ll see their name on the billing statement instead.
You can also check your payment method. Apple-billed subscriptions appear on your credit card or Apple Pay statement as “APPLE.COM/BILL” or something with the word Apple. Outside-billed subscriptions show the company’s name directly, like “NETFLIX.COM” or “SPOTIFY”.
If you’re still unsure, open the app itself. Go to the settings or account tab inside the app. Look for a “Subscription” or “Billing” section.
If it shows a manage option that leaves the app to open a website, that’s outside-billed.
For Apple-Billed Subscriptions: Cancel in Settings
If you confirmed the subscription is Apple-billed, you can cancel it right from your iPhone. This works for everything from iCloud+ to Apple Music to whatever random fitness app you tried during the New Year push. Here’s the path.
Open the Settings app. It’s the grey gear icon on your home screen. Tap your name at the very top.
That takes you to your Apple ID screen. Then tap Subscriptions. You’ll see a list of every active subscription tied to your Apple ID, along with the ones that have expired.
Find the subscription you want to cancel and tap it. Then tap Cancel Subscription. Confirm the action when the alert pops up.
The Step-by-Step Settings Path (Your Apple ID > Subscriptions)
Let’s break that down into a numbered list, because it’s easy to miss the tiny “Cancel” button if you’re in a hurry.
- Open Settings.
- Tap your name at the top of the screen. This is your Apple ID or Apple Account.
- Tap Subscriptions. You might need to scroll a little if you have a long list of purchases.
- Tap the subscription you want to cancel.
- Tap Cancel Subscription at the bottom of the screen. If you’re on a free trial, the button will say Cancel Free Trial instead.
- Tap Confirm to finish.
One important detail: you’ll only see subscriptions associated with the Apple ID you’re currently signed into on the iPhone. If you purchased something with a different Apple ID, you won’t see it here. You need to sign out of your current Apple ID and sign in with the one that made the purchase.
That’s a common hurdle, especially if you share a phone with family or changed your Apple ID over the years. After you cancel, the subscription stays active until the end of the current billing period. You keep access until then.
Then it just stops renewing.
The App Store Alternative: Same List, Different Door
The Settings path is the most direct, but there’s another way into the same list. Open the App Store app. Tap your profile icon in the top right corner of the screen.
It looks like a small version of your Apple ID photo or initials. Then tap Subscriptions. You’ll land on the exact same page you’d see in Settings.
Why use this route? It’s faster if you’re already in the App Store. It also works when Settings is being weird, which is rare but happens.
Some users report that the Subscriptions option disappears from their Apple ID screen in Settings after an iOS update. The App Store path gives you a second way in.
One thing to keep in mind: this alternative doesn’t show any extra subscriptions. It’s the same list, fed by the same Apple ID. If a subscription isn’t in Settings, it won’t be in the App Store either.
So if you’re hoping to find a missing subscription here, you’ll be disappointed. That’s the sign you need the next section.
For Outside-Billed Subscriptions: Cancel at the Source
Here’s where a lot of people get stuck. You open Settings, tap Subscriptions, and your list is clean. No mystery charges.
But your credit card statement shows $14.99 going to some app every month. How is that possible? Because the subscription was never billed through Apple.
You’re now dealing with an outside-billed subscription.
These require a completely different approach. You have to go to the company’s website or billing portal and turn off auto-renewal there. Apple has no control over these charges.
That means you can’t cancel them from your iPhone no matter how hard you try.
Netflix, Spotify, and Other Apps That Bill You Separately
Let’s look at the big examples. Netflix doesn’t offer in-app subscriptions on iPhone anymore. If you signed up on Netflix’s website, you cancel on their website.
Open a browser, go to netflix.com, log in, go to your account page, and click “Cancel Membership.” Spotify works the same way. If you subscribed through the Spotify app or website, you manage it at spotify.com/account. The same goes for services like Amazon Prime, Hulu, Disney+, and most cloud storage providers that let you pay directly.
Even apps that once used Apple’s billing sometimes switch you to external billing after a price increase. That happened with several major streaming services in the last few years. So even if you originally signed up with Apple, double-check your current billing statement.
The company may have migrated your account to its own payment system. In that case, your Apple Subscriptions screen will be empty, but you still have an active account. You’ll need to log into the service’s website to cancel.
A simple rule: if you don’t see the subscription in Apple’s list, go to the app’s website and find the billing or account settings. Look for a button that says “Cancel Plan,” “Turn Off Auto-Renew,” or “Disable Auto-Pay.” Every service uses slightly different wording, but the goal is the same. After you cancel, they’ll usually send a confirmation email.
Keep it. It’s your proof if a charge shows up later.
What Actually Happens After You Hit Cancel (Access, Refunds, Renewal Dates)
So you tapped Cancel. Now what? First, know that canceling doesn’t stop your access immediately.
Apple’s policy states that subscriptions remain active until the end of the current billing period. If you paid monthly on the 15th, you’ll still have access until the 15th. Then the subscription expires and won’t renew.
That’s true for Apple-billed subscriptions. It’s also true for most outside-billed services. Netflix, Spotify, and similar companies let you keep watching until your paid period ends.
Some services, like certain news apps, might cut you off early if they have stricter terms. But the standard rule across the industry is that prepaid time belongs to you.
Your Apple Subscriptions screen will update to show a status like “Expires on [date].” The app itself will still work until then. You just won’t be charged again. If you want to delete the app after canceling, that’s fine, but know that you can’t get a refund for the remaining days unless you ask for one.
Refunds are a separate thing. Cancelation stops future charges. Refunds return money you already paid.
Apple doesn’t automatically refund canceled subscriptions. If you cancel an annual plan two days in and hope for a prorated refund, you’ll be waiting. You need to request a refund manually through Apple’s Report a Problem portal.
We’ll cover that in a later section.
One more detail: you can resubscribe anytime. Canceling doesn’t delete your account, your history, or your saved content. If you subscribe again later, you’ll usually pick up where you left off, barring any major changes to your account.
Free Trials: Cancel Right Away Without Losing Access
Free trials are where most people get burned. You sign up for a 7-day trial, forget about it, and get charged on day 8. The fix is simple: cancel the moment you start the trial.
You won’t lose access. The trial keeps running until it ends. The subscription just won’t renew.
This applies to Apple-billed trials and most external ones. Apple’s official guidance confirms that canceling a free trial immediately doesn’t revoke your access to the trial period. Same goes for Netflix, Spotify, and most major services.
They all want you to experience the product. They just don’t want to charge you prematurely.
Here’s the workflow. Start the free trial as you normally would. Open your iPhone’s Subscriptions screen right away.
Find the new trial, tap it, and hit Cancel Free Trial. Confirm. Then set a calendar reminder for the last day of the trial if you want to check whether the service kept working.
It will.
The only exception is when a service requires you to cancel through their own site. That happens when the trial was set up on the web, like YouTube TV or certain fitness apps. In that case, just log into the service’s website and turn off auto-renew from there.
One thing to watch: some trials have weird billing windows. A 7-day trial that starts at 11:45 PM might renew at 11:45 PM on day 7. That’s a narrow margin to miss.
Cancel immediately and you’ll never have to think about it.
Family Sharing: When Someone Else Controls the Subscription
Family Sharing changes everything about cancellation. If you’re in a family group, the organizer is the only person who can manage purchases and subscriptions for shared purchases. You might think you’re canceling a subscription from your own iPhone, but you won’t find it on your list.
Here’s how it works. When a family member buys a subscription using the family’s shared payment method, it belongs to the organizer’s Apple ID. That’s usually the adult who set up the family group.
So if your spouse signed up for an app and you’re trying to cancel it, you’ll need them to log in and do it.
Even if the subscription is on your device, it might not show up in your Settings. Why? Because it’s tied to the organizer’s Apple ID, not yours.
The same goes for Apple’s own services like Apple Music or iCloud+. If the organizer set up Family Sharing, they’re the one who sees the subscription and the cancel button.
Your options depend on your role. If you’re the organizer, just use the standard Settings path. If you’re a member, you can’t cancel a family purchase from your own device.
You’ll need access to the organizer’s Apple ID or their phone. Practically, that means asking the organizer to cancel it.
There’s another wrinkle. Some subscriptions let each family member get their own subscription under the family plan. Others don’t.
Look at your Family Sharing settings to see who’s subscribed to what. Go to Settings, tap Family, and check the purchases. That’ll give you a clearer picture of what’s shared and what’s personal.
Common Mistakes That Keep Subscriptions Alive (Deleting the App Doesn’t Work)
This is the classic error. You delete an app from your home screen, assume the subscription is gone with it, and then get charged again three weeks later. Deleting an app never cancels a subscription.
The two are completely separate in Apple’s system. The app is just a front end. The subscription is a billing agreement that lives in your Apple ID or the service’s database.
Another mistake is hiding the app instead of deleting it. Apple has a feature that lets you “hide” purchases so they don’t appear in your purchased list. That doesn’t cancel anything either.
You’re just hiding the icon from your own view. The billing clock keeps ticking.
Then there’s the “I canceled in the wrong place” problem. Maybe you opened the app’s own settings and found a “cancel” button that actually just turned off notifications. Or you toggled something that looked like auto-renew but was actually something else.
The only reliable cancel is through the official Apple Subscriptions screen or the service’s official billing page.
People also forget about subscriptions tied to an old Apple ID. You switched from one Apple ID to another years ago, but the old one still has a subscription running. You never see it because your phone is signed into the new ID.
That’s how people end up paying for an app they forgot with an account they forgot.
Finally, don’t fall for the “contact us to cancel” trap. Some apps don’t offer a self-service cancel button, especially for subscriptions billed outside Apple. You have to call or email support.
That’s annoying, but it’s the only way. Just make sure you get written confirmation that your subscription is canceled.
Troubleshooting: Subscription Not Showing in Settings? Try These Checks
You open Settings, tap your name, tap Subscriptions, and nothing’s there. But you know you have a subscription. Maybe you get emails about it, or your bank statement shows charges.
Here’s how to solve that mystery.
First, check which Apple ID you’re signed into. Go to Settings, tap your name, and look at the Apple ID at the top. If it’s not the same Apple ID you used for the purchase, that’s your answer.
Sign out and sign back in with the correct ID. Subscription lists are tied to the Apple ID, not the device.
Second, refresh the Subscriptions page. Pull down from the top of the list to refresh. Sometimes the page takes a second to sync with Apple’s servers.
A full restart of your phone also fixes weird display glitches. We’ve seen that clear up more than one invisible subscription issue.
Third, look for an email from Apple. Every Apple-billed subscription generates a receipt email. Search your inbox for “Apple” or the company name.
The receipt will tell you exactly which Apple ID was used. If you don’t have access to that email, try the “Report a Problem” portal on Apple’s website. It can show you all your recent purchases.
If the subscription is nowhere in Apple’s system, it’s outside-billed. We covered this earlier, but it’s worth repeating. Go to the service’s website directly.
Log in with the account you used to sign up. Look in settings or account management for subscription status. If you find a “cancel” or “turn off auto-renew” button, you’re in the right place.
One last check: your region. Apple’s Subscriptions screen only shows subscriptions purchased in the same App Store region as your current Apple ID. If you’ve moved countries or changed your store region, old subscriptions might disappear from view.
You can still cancel them by contacting Apple Support or the service directly.
A final tip: if you still can’t find it, check whether you ever actually subscribed. Maybe it’s just a one-time purchase that billed twice, or a charge from a different family member’s account. Log into Apple’s website and review your full purchase history to see what’s really coming from your Apple ID.
Apple One and Bundled Plans: Canceling the Bundle vs. One Service
Apple One is a different beast. It’s a single subscription that bundles iCloud+, Apple Music, Apple TV+, Apple Arcade, Apple News+, and Fitness+ together. You pay one monthly price for the whole package.
That means you don’t manage each service separately.
If you have Apple One, you’ll see it as one entry in your Subscriptions screen. Tap it and you’ll see the plan details, the price, and the cancel option. But here’s the catch: you can’t pick and choose which services to keep.
Canceling Apple One cancels everything in the bundle at the end of your billing period.
If you only want to drop Apple Arcade but keep iCloud+, you have two options. First, you could cancel Apple One entirely and then buy iCloud+ as a standalone subscription. Second, you could downgrade your Apple One tier if a cheaper tier exists without Arcade.
For example, the Individual and Family tiers both include Arcade. The Premier tier adds News+ and Fitness+. There’s no tier without Arcade, so the only way out is to go standalone.
A common trap: you had a standalone subscription for iCloud+ and Apple Music. Then you signed up for Apple One. Apple automatically paired those standalone subscriptions into the bundle and stopped billing them separately.
If you cancel Apple One, those standalone subscriptions won’t automatically come back. You’ll need to resubscribe to them manually.
Downgrading Apple One Tiers
If money is the issue, downgrading might be smarter than canceling. Open Settings, tap your name, tap Subscriptions, then tap Apple One. You’ll see an option to switch between Individual, Family, and Premier.
Each tier changes the price and the services included.
The switch takes effect at your next billing date. You still get the full bundle until then. No partial refunds, no prorating for the current period.
If you downgrade from Family to Individual, people in your Family Sharing group might lose access to shared services like Apple Music. So check with the family before you tap that button.
Already Charged? How to Request a Refund from Apple
So you canceled too late. The charge went through, and now you want your money back. For Apple-billed subscriptions, that’s possible but not guaranteed.
You need to go through Apple’s refund system.
The simplest route is the Report a Problem portal. Open a browser and go to reportaproblem.apple.com. Sign in with the Apple ID that made the purchase.
You’ll see a list of your recent transactions. Find the subscription charge, click it, and select “Request a Refund.”
Apple will ask you to pick a reason. Options include “Didn’t mean to purchase,” “Didn’t recognize this purchase,” “Service not as expected,” and “Other.” Your choice matters, but not as much as your refund history. First-time refund requests are frequently approved.
Repeat requests get scrutinized.
Don’t expect instant money. Apple says refunds are typically processed within 48 hours, but in our research, many users report waiting 3 to 5 business days. The refund goes back to your original payment method.
That’s your credit card, debit card, or Apple Account balance.
For outside-billed subscriptions, Apple can’t help you. If Netflix charged you, you have to contact Netflix support. The same goes for Spotify, Disney+, and any other service that bills you directly.
Their refund policies vary widely. Some offer prorated refunds. Others won’t refund anything under any circumstances.
Your best bet is to check their help center and file a billing dispute if the charge is genuinely unauthorized.
One important note: canceling a subscription and requesting a refund are separate actions. You should do both. Cancel to stop future charges.
Request a refund to get back money you already paid. If you only cancel, you won’t get a refund. If you only request a refund, the subscription stays active and renews again next month.
Also, don’t request refunds for free trials. If you signed up for a free trial and got charged, that usually means the trial already ended or you were ineligible. Apple will likely reject that refund request.
Instead, check the terms of the trial and contact the developer if you think the charge was an error. Apple’s official support pages give the full policy if you need the legal details.
Final Decision Guide: Which Path Should You Take? (Flowchart in Words)
Let’s put this whole workflow together. You want to delete a subscription on your iPhone. The right path depends on a series of yes-and-no questions.
Walk through them in order and you’ll find the answer.
Step 1: Find the charge. Look at your bank statement or email receipt. Who billed you? If it says Apple or iTunes, follow the Apple path.
If it says another company, go to that company’s website.
Step 2: Check the Apple Subscriptions screen. Open Settings, tap your name, tap Subscriptions. If the subscription is there, tap it and cancel it. Done.
Step 3: Subscription not there? Check your Apple ID. Are you signed in with the same Apple ID that made the purchase? If not, sign out and sign back in.
Then check again.
Step 4: Still not there? Check your Family Sharing settings. Is someone else the organizer? If organizing the family, the subscription belongs to that person, not you.
Step 5: Still not there? Check your region. If your App Store region changed, old subscriptions might not appear. Contact Apple Support.
Step 6: If none of that works, it’s outside-billed. Go to the service’s website, log in, and find the billing section. Turn off auto-renew or cancel the plan.
Step 7: Already charged? Request a refund from Apple if it was billed through Apple. Contact the company if it wasn’t.
| Situation | Where to Cancel | Who to Contact for Refund |
|---|---|---|
| Subscription appears in Settings | Settings > Your Name > Subscriptions | Apple via Report a Problem |
| Subscription doesn’t appear | Service’s website or app | The service’s support team |
| Free trial active | Subscriptions screen or service website | Usually no refund needed |
| Family Shared subscription | Organizer’s Apple ID | Apple Support |
| Apple One bundle | Subscriptions screen, cancel entire bundle | Apple via Report a Problem |
| Old App Store region | Contact Apple Support | Apple Support |
That’s the whole map. Memorize the first branch and you’ll never get stuck again. Apple-billed means Settings.
Outside-billed means the company’s own website. Everything else is just a variation.
Frequently Asked Questions
Can I cancel a subscription on iPhone without the app installed?
Yes. As long as it’s an Apple-billed subscription, you can cancel from Settings or the App Store without the app on your device. Go to Settings, tap your name, tap Subscriptions, and cancel.
For outside-billed subscriptions, you need to log into the service’s website, even if the app is gone.
How do I cancel a subscription that is not showing up in Settings?
First, make sure you’re signed into the correct Apple ID. Then check Family Sharing. If it’s an outside-billed subscription, it won’t appear in Settings no matter what.
Log into the company’s website and turn off auto-renew there. If you still can’t find it, contact Apple Support with your receipt.
Will I get a refund if I cancel a subscription immediately?
No, not automatically. Canceling a subscription stops future charges. You keep access until the end of the billing period.
If you want money back for the current period, you need to request a refund through Apple’s Report a Problem portal or the service’s own support team.
Does canceling a subscription on iPhone delete my account?
No. Canceling a subscription ends the billing agreement. Your account, data, playlists, and history stay intact.
You just lose access to paid features. If you subscribe again later, you’ll usually start where you left off.
Why did my subscription renew after I canceled?
One of three things happened. You canceled in the wrong place, like inside the app instead of the Subscriptions screen. You canceled an outside-billed subscription through Apple, which doesn’t affect it.
Or you canceled a free trial after the trial already ended, which means the paid subscription was already active.
How do I cancel a subscription on iPhone after a free trial?
The process is the same as canceling a regular subscription. Open Settings, tap your name, tap Subscriptions, find the service, and tap Cancel Free Trial. You keep access until the trial ends.
For outside-billed trials, go to the service’s website and turn off auto-renew.